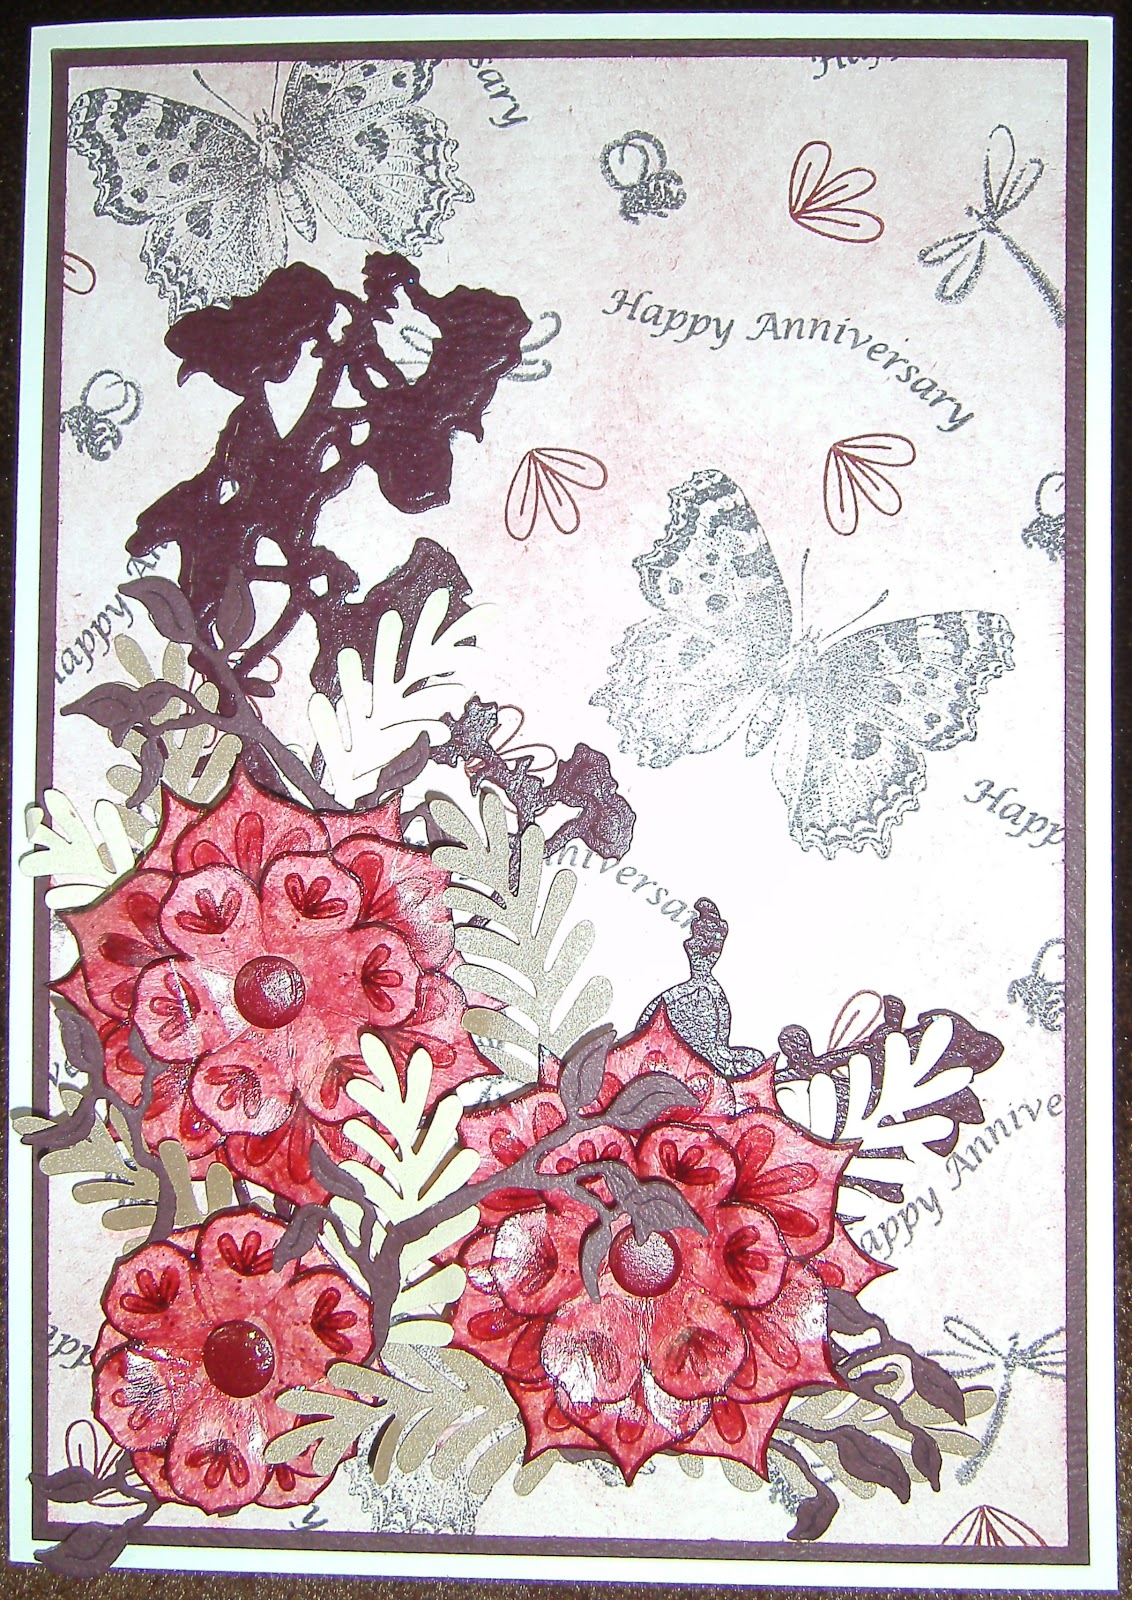
Tuesday 20 November 2012

Happy Anniversary

I wanted a quick Anniversary card and Petal Passion just seemed to jump onto the stamping block! I had alot of fun making this one!


How to make:
  • The background for this card was made using some Dimension Stamps stamps and some artemio stamps, I randomly stamped them all over then distressed the background in aged mahogany.
  • I then backed onto burgundy card and mounted onto an A5 cream card.
  • Next I stamped the medium and small flowers from Petal Passion (ref: 2400065A) four times each onto cream card stamping the small three petal stamp in each petal of the medium flower and the three petals from the flourish onto the small flowers.
  • I then cut out, distressed and shaped them to make two flowers with two medium and one small flower and the last flower was made from two small flowers. I added a card candi to each flower.
  • Next I die cut some leaves and fern from burgundy and cream card.
  • Finally I arranged and attach the flowers and ferns to the bottom left hand corner of the card and added glitter glue to the flowers.      

Sunday 18 November 2012

With Deepest Sympathy

I wasn't quite sure what to do on this card, but I think it worked well!


For this card I used Petal Passion (ref: 2400065A) stamp set from Dimension Stamps.

How to make:
  • A dark grey pearl die cut was attach down the left hand side of an A5 white card.
  • Stamp four medium and small flowers from petal Passion onto white card in black ink.
  • Stamp the small three petal stamp into each petal of the medium flowers and the small three petals from the end of the flourish in each petal of the small flowers.
  • Cut out and shape make two flowers from two medium and one small flowers the last flower from the two small flowers, add a dark grey card candy to each flower
  • Next die cut three leaves from pale silver card scrunch up open out and distress with black soot, die cut five flourishes from black card,
  • Onto white card stamp “With Deepest Sympathy“ with parts of the flourish around it mount onto black card and attach on an angle to the dark grey die cut shape.
  • Finally arrange and attach the flowers, leaves and flourishes to the bottom left hand corner.

Friday 16 November 2012

Thinking of you

I wanted this card to be very simple but elegant and I think it work!


For this card I used The Luscious Lily (ref: 2400058) stamp set from Dimension Stamps.
 
How to make:
  • Stamp the small Lily in the bottom right hand corner of an A5 white card in black ink
  • Next stamp “ Thinking of You” (I am not sure where I got this stamps from!) across the corner above the Lily.
  • Along a piece of white card stamp three of the small Lilies close together, the middle lily being the opposite way round.
  • Trim down and edge with a silver marker pen and mount onto black card.
  • Attach down the left hand side of the A5 card.
  • Stamp six more of the Lily flowers,  cut out three full flowers and three with less petals, shape and decoupage onto the three on the strip of card.
  • Finally add three black card candies down the top right hand corner.

Wednesday 14 November 2012

Happy 60th Birthday

My daughters father in law recently celebrated his 60th birthday and as he is mad on fishing, so I decide to give his card a fishy theme!


How to make:
  • To make the background I randomly stamped any fishing and time stamps I had onto white paper in memento Paris dusk.
  • It was then distressed using chipped sapphire and trimmed to a 19cm x 19cm square, then mounted onto a piece of dark blue pearl card.
  • Down the right hand side  I attached two pieces of blue/white checked ribbon, and attached it to an eight inch square Kraft card.
  • Next I die cut the tall and middle sized shadow flowers (Spellbinders S5-066) and th from dark blue pearl card.
  • I then stamped three fish and 60 onto white card in Paris dusk, over stamp the 60 with stamps from the backing paper.
  • Cut out the fish and 60 distress with chipped sapphire and shape.
  • Stamp a fishing scene onto white card in Paris dusk and mount onto dark blue pearl card, attach the scene over the two pieces of ribbon on the right of the card.
  • Using 3D glue I attached the 60th below, the two shadow flowers to the left of the card with the three fish swimming through the flowers.
  • Finally I added a knot to the top of each ribbon and blue glitter glue to the fishes.

Monday 12 November 2012

Wedding Card

My great nephew recently got married, its funny how time flies it seems like only yesterday he was playing in my garden, and now he is a grown married man! Congrats to him and his lovely wife.
 
Anyhow, enough reminiscing here's his (sorry) their card.


For this card I used the following stamps from Dimension Stamps: Petal Passion (ref: 2400065A), Uppercase Alphabet (ref: 2400050a), Lowercase Alphabet (ref: 2400060a), and the Grand Word Perfect (ref: 1803062a).
 
I also used Tim Holtz Tattered leaves 656927 Sizzix Die.

How to make:
  • Back the front of an A4 white card with a piece of lilac card leaving a 0.5 border all around.
  • Stamp the swirl from Petal Passion in Memento Grape Jelly around the edge of the lilac card.
  • Next stamp "Congratulations" onto a darker lilac card in Memento Tuxedo Black. In the letters randomly stamp "Wedding Day", "Mr and Mrs" from the Grand Word Perfect set and the swirl from Petal Passion in Memento Grape Jelly.
  • Cut out and shape the letters, then attach them to the lilac card with 3D glue, down from the top left hand corner to the bottom right hand corner over lapping the letters.
  • Using Petal Passion stamp the large and small flowers once, and the middle flower twice onto the darker lilac card in Memento Tuxedo Black, over stamp the flowers with the swirl in Memento Grape Jelly.
  • Cut out and shape the flowers, attach a silver crystal brad through all four flowers.
  • Punch or die cut four fern leaves from the darker lilac card and three leaves from light lilac card and over stamp with the swirl in Memento Grape Jelly, scrunch up open out and distress with Dusty Concord Distress Ink.
  • With 3D glue attach the leaves, fern and flower to the bottom left hand corner of the card.
  • Die cut two butterflies from dark lilac card over stamps the wings with the swirl in Memento Grape Jelly, shape the wings and glue together along the body and attach to the top right hand corner of the card by the body, and finally add lilac glitter glue to the body.

Saturday 10 November 2012

Thank You!

I needed a Thank You card and wanted to use the Dimension Stamps Octobers Project club stamp set. I think it worked quite well.


For this card I used the following stamps from Dimension Stamps: Paper Garden (ref: 2400045A), Uppercase Alphabet (ref: 2400050a), Lowercase Alphabet (ref: 2400060a) and Seasonal House (ref:1402037a).

I also used Elegant Flourishes 656639 die from Sizzix.
 
How to make:
  • Stamp the flourish from the Paper Garden stamp set down the left hand side and across the bottom of an A5 white card in Memento Elderberry ink.
  • Lightly distress with Dusty Concord Distress Ink, onto to a 15.5cm x 9.5cm piece of white card.
  • Stamp the house with bricks, the sun and pathway to the right hand side of the card in Memento Elderberry, stamp parts of the flourish from Paper Garden to each side of the house to look like trees, colour in using toning Promarkers.
  • Edge the card in the darkest colour, distress with Dusty Concord.
  • Stamp "Thank You" onto white card over stamp with the flourish in Memento Elderberry, cut out and distress with Dusty Concord shape the letters and attach using 3D glue - Thank going down to a piece of lilac pearl card over lapping the letters so it’s only 15.5cm long and "You" across another piece of lilac pearl card to fit under the house stamped card, when dry trim around the words.
  • Attach the house to the top right hand corner, "Thank" down the left hand side and "You" below the house,
  • Finally add some dark lilac flourishes and a fabric flower.

Thursday 8 November 2012

Sew Creative: Sewing Basket

What sewing room would be without a sewing basket, or in my case that basket which is full of all those bits that you don't know where they came from, or what they are off, but come in handy far to often!
Sorry about the picture!
 
This basket was made using Sew Creative stamp set (ref: 2400073a) from Dimension Stamps.
 
How to make:
  • Paint a round paper mache basket in white and the handle in lilac pearl acrylic craft paint.
  • Cover the outside of the basket in cream fabric.
  • Stamp eight cotton reels onto light tan fabric (which has no sew heat “n” bond attached) in black Verascraft ink, iron over the fabric paint with fabric paints iron after each coat of paint.
  • Stamp four buttons on coloured fabric in black.
  • Onto two strips of pink flowered fabric stamp five buttons and paint.
  • Narrow hem the two short sides and one long side, pleat each piece over the top edge of the basket and glue to the inside.
  • Line the inside of the basket in pink flowered fabric.
  • Cut out four cotton reels with needles and four without, glue the cotton reels one with and one without needle around the bottom of the basket, and a button resting on the one without needle.
  • Stamp “You have me in stitches!” in black onto pink ribbon glue onto the handle.

Tuesday 6 November 2012

Sew Creative - T-Shirt

I love the buttons on the Sew Creative stamp set (ref: 2400073a) I couldn't resist adding them to a plain t-shirt.


How to make:
  • Wash and iron the t-shirt put some card between the layers where you are going to stamp - this stops the ink going through to the back!
  • Using  black Versacraft ink stamp the heart and flower buttons around the sleeves above the hem, iron and paint using two colours of fabric paints - iron between each coat of paint.
  • Stamp five buttons in a row 2cm down from the neck seam, three in the row under and one in the last row paint as on the sleeves.
  • Stamp “You have me in stitches” twice above the first row of buttons so it starts and finishes in line with the edges of the buttons on the first row
  • In the space in the middle of the words put a row of dots in the colours of the buttons.


Sunday 4 November 2012

Sew Creative: Fabric Card


For this card I used up my left over buttons from the wall hanging!
 
 
For this card I used the Sew Creative stamp set (ref: 2400073a) from Dimension Stamps and a Tim Holtz die  called Sewing Edge (657829).
 
How to make:
  • Cover the front of an A5 white card with patterned cream fabric.
  • Stamp the metal manikin using black verascraft ink to the left hand side of the card and decorate with purple fabric stickers - a handbag, hat and a flower.
  • The five buttons were stamped onto coloured fabric and the solid manikin stamped onto pink flowered fabric  - Dont forget your no sew heat “n” bond
  • Paint the wood on the manikin in fabric paint.
  • Cut out buttons and a manikin.
  • Die cut Sewing Edge from light tan fabric and paint with fabric paints - iron after each coat of ink or paint.
  • Attach border to the bottom of the card and the five buttons around the top right hand corner.
  • Dress the solid manikin with a cream lace skirt and attach to the right hand side of the card.
  • Finally tie some ribbons, trims and wool in a knot and attach down the left hand side of the card.        

Friday 2 November 2012

Sew Creative: Wall Hanging

I just love the new stamp set from Dimension Stamps its called So Creative (ref: 2400073a), it is just fabulous!
So when Faye asked if I could do a couple of samples using fabric, the sewing machine was out in a flash!


To make this wall hanging I mainly used fabric paints, Autumn Leaf and Black Versacraft ink, just remember to wash and iron the fabric before stamping onto it.
 
I used No sew heat “n” bond to attach the stamped images onto the fabric. When cutting out fabric shapes attach the heat ”n” bond before stamping and iron between each layer of paint or ink.
 
Finally it is easier to cut the fabric into the desired panel sizes before stamping and painting, as you can get carried away and end up stamping in the wrong places!
 
For the lettering I used the Uppercase Alphabet set (ref:1801012A).